How to make the ImpressionsUpdated 4 months ago
For a successful impression, be sure to check out our instructional video:
https://www.veneera.com/pages/video-tutorial-impression-teeth-veneer
And then send us your impressions as pictures to our WhatsApp support: +1 469 206 9176, via Facebook Messenger or via Text Message +1 855 913 5543
Alternatively, here are the instructions in writing.
Step 1: Preparation
Prepare Materials:
Place the impression tray and a clean surface in front of you, ensuring the area is well-lit so you can clearly see each step.
Mix the Putties:
Take the two putties out of their packaging and knead both componentswith your thumbs until a uniform yellow putty forms. This process should be done quickly (approximately 30 seconds) to ensure the materials bond well together. Ensure that the putty is evenly mixed, as insufficiently mixed putties may not harden properly, which is indicated by the white color still being visible.
Step 2: Taking the Impression
Shape the Putty:
Form the mixed putty into a crescent shape. Make sure that the putty is thick enough to completely cover the impression tray. This is important to ensure that there is enough material to capture all of your teeth.
Press the putty evenly into the impression tray, ensuring that it covers the tray entirely. Pay special attention to ensure that the impression material fully conceals the tray’s height. If the putty is not tall enough, the upper parts of your teeth may not be captured.
Position the Tray:
Hold the impression tray in your hand and carefully position it in front of your teeth. Press the impression tray with the putty directly against your teeth. Ensure that the putty fits snugly around your teeth.
Press firmly to ensure your teeth are well-captured, but be careful not to create any holes in the impression. The impression tray should not be visible, which means the putty should be well-shaped around your teeth.
Hold the Position:
Maintain this position for three minutes. This allows the putty sufficient time to harden. During this time, remain still to avoid any distortions in the impression. Try to stay relaxed and breathe evenly.
Remove the Impression:
Carefully pull the impression away from your mouth by gently pulling the tray forward. Make sure not to pull too hard to avoid any discomfort or injury. Check the impression for any irregularities or holes. If you are satisfied with the impression, you can proceed to the next step.
Step 3: Applying the Design Fluid
Prepare the Syringe:
Take the dual syringe and attach a tip to it. Ensure twist and lock the tip to the syringe to ensure it is securely locked in place to prevent any leakage of the design fluid.
Distribute the Fluid:
Gently press the syringe plunger to evenly distribute the design fluid over your impression. Make sure to apply a generous amount of fluid so that all areas of the impression are well covered, but also be sure to leave some fluid for other attempts. Then, reposition the impression tray back onto your teeth. It is crucial that you fully fit into the impression you prepared in Step 1 to ensure a precise fit.
Let It Set:
Again, hold the impression in place for three minutes without moving. Ensure that the impression remains firmly against your teeth so that the design fluid can harden optimally.
Important Note:
If you need to take a break from working with the impressions, place the cap back on the syringe to prevent the design fluid from hardening. This is important to ensure that you can still use the material later.
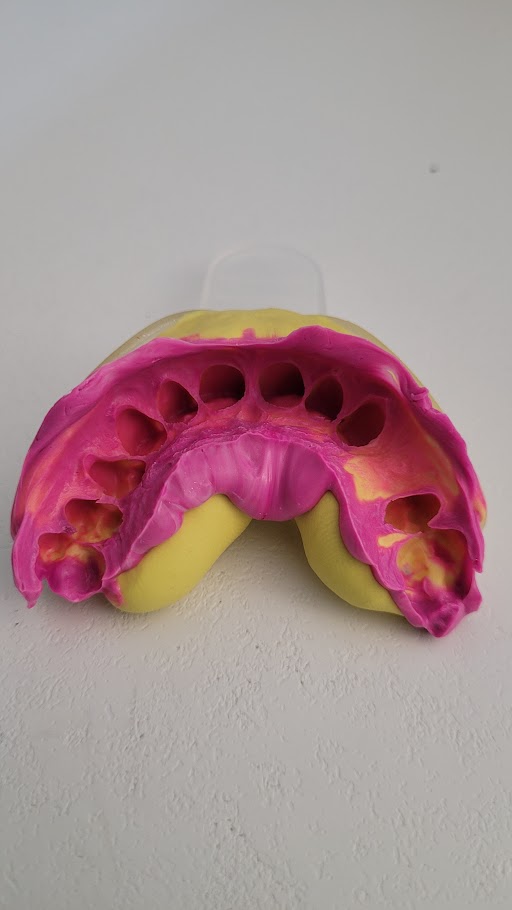
Final Check:
Finally, check whether the design fluid has captured all the gaps between your teeth and the gum lines effectively. This means we can clearly see where your tooth ends and your gum begins. Accurate capture of these areas is crucial for the fit of the future products.
Here’s the final step, incorporating your request to explain why the customer should send a picture of their impression:
Final Step: Sharing Your Impression
Evaluate Your Impression:
Once you have completed your impression, take a moment to carefully inspect it. Look for any imperfections, such as air bubbles, uneven areas, or holes. A successful impression will have clear outlines of your teeth and gums without any visible gaps or distortions.
Send Us a Picture:
If you are satisfied with your impression, please send us a picture of it via Facebook or WhatsApp. This step is crucial for a couple of reasons:
Quality Check: Sending a photo allows us to review the quality of your impression before proceeding with your order. We want to ensure that it meets our standards and that it will create an accurate representation of your teeth.
Faster Processing: By sharing a picture, we can provide immediate feedback and address any potential issues before you send the impression to us. This can save time and help avoid delays in the production of your veneers.
A must-have for your perfect smile: Our Mirror-Case